

Sunday, October 3, 2010

Show Us Your Life - Dining Room

Kelly's Korner hosts a weekly Show Us Your Life series and this week's topic is Dining Rooms.  Our dining room doesn't get daily use but it's great to have it available.  It is one of my favorite rooms in the house because it is usually clean and pretty without much effort.  It's looked pretty much the same for the past few years...

Here's what it looks like now!


Here are some crummy cell phone photos taken at night in 2008...

 Back to now.  Here's the dining room in Fall 2010!
 

We snagged our table for $100 because it had a small scratch on the top.  I like the chunky farmhouse look of it.  The chairs were hand-me-downs from family but in a happy accident they match the table top well.  It seats six people comfortably but I like to keep a couple chairs under the built-ins.

 We picked this buffet up a few years ago for under $100.  The glass cabinets hold some hand painted wine glasses, pottery, a glass cake stand, and etched wine glasses.  The top two drawers are filled with table linens and the third one holds our electric carving knife. 

 I love picnics so I'm keeping our picnic basket out on the buffet.  You can see one of our oceanfront sunset picnics here.  The basket is stocked with our picnic dishware and linens so we only need to add some food and beverages and we're ready to go! 

I picked up the mini pumpkins (2 for $3) and flowers ($4 for 10 stems) at Whole Foods.  The table runner is from Home Goods.

 The fabulous built-ins hold my sunflower dishware that I wrote about here.  Jake did an awesome job adding this feature to the room in 2007.  I love the bead board detail.

The pressed tin ceiling in here is one of my favorite features of the whole house.

 The chandelier came with the house and has just enough sparkle.

This is on the left side of the doorway to the living room.  The media cabinet was a freebie that holds most our dvds and some books.
The lemons and lime in the pitcher are real and I love to cook with them.  The scarecrow and mini pumpkin add a touch of fall whimsy.

This is on the right side of the doorway to the living room.  We've had the front drop desk and the corner tv stand (that holds Jake's super 42" plasma tv) since our first apartment.  We used to have a matching coffee table too but I broke it last fall.

 Here's one last look into the dining room from the living room.

You can check out our living room and master bedroom too.  Next week's topic is Kitchens and I'll be joining in the fun again.  UPDATE: Our kitchen and office
Thanks for stopping by and come again soon!  :)



Show Us Your Life with Kelly's Korner

Tuesday, September 28, 2010

Customized Wall Art - Easy and Inexpensive!

Hi!

As promised during our master bedroom tour here this weekend, I'm sharing how we made our custom wall art.  It was super easy and we made two 20 x 20 inches panels for under $20. 

It started when we came across the Tyglosa frames for fabric at Ikea.  They cost $5 per frame and after considering how easily we could make a DIY version for less we decided to just buy two.  I'll share lots of photos today so you can get some ideas for making your own version for even less.

Supplies list for two panels
2 20x20 inches frames
2 pieces of fabric at least 25.5 x 25.5 inches
Scissors or mat & rotary cutter
Drill or screwdriver
Electric stapler

When you open Ikea's packaging find the four screws mixed in with the nails.  You can set the little nails aside because we aren't using them.
 Put together the frames.  I bet you can do each one in under 60 seconds...  Use these photos to help you come up with your DIY adaptation.  I'll be poking around in the basement looking for scraps so I can make some...

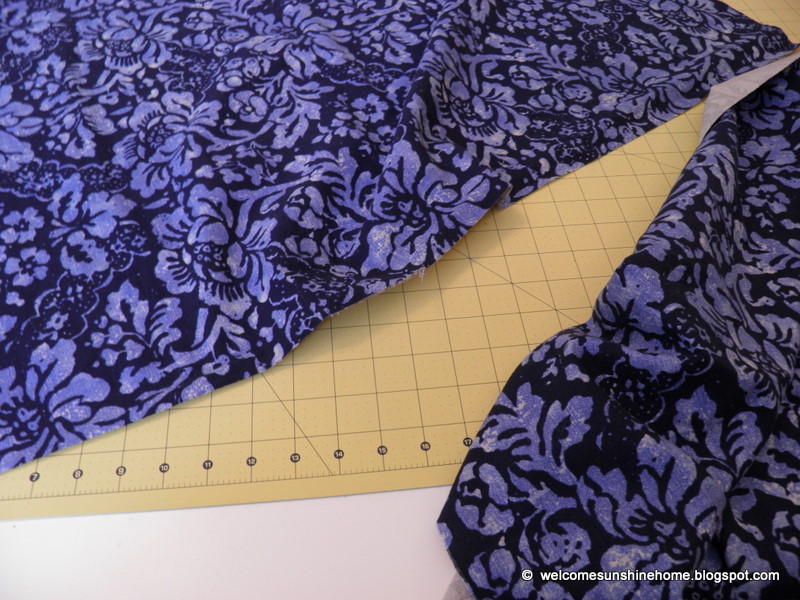
After I put the frames together I moved on to cutting my fabric.  I used one yard of fabric that was about 60 inches wide.  I found it on the bargain table at Joanns for $9/yard.  Score!  It's Eddie Bauer blue batik that's used in their Piedmont collection (thanks google search!).  I loved the canvas texture and rich colors.  If you're in the Portland area and like this, there was plenty left on the decorator fabric roll on Saturday.

Any way, I lost my mind when I started working with the fabric and didn't make the best choices.  I should have salvaged larger pieces of fabric but instead I ended up with strips leftover.  You'll see... 

I started by cutting my piece of fabric in half so I had two 30 X 36 inch pieces.

 Next, I decided that I wanted to work with 30 x 30 inches pieces because the frames are square.  If you were thinking, "That fabric is so 2009" you are correct.  Don't worry about any of the edges because they won't show anyway.

 Ta da!  There's my square fabric!  Next, I put my frame flat side down on the backside of the fabric and quickly realized that I'd be trimming a lot of fabric soon.  Oops.

 My favorite part...staple it!  I didn't bother ironing because I knew this fabric would stretch well on the frame.  Hammer any staples that don't go in all the way.

 Trim away the excess fabric.

Staple down the opposite side.

 When you get to the fourth side try to get some help so the fabric stays smooth and tight against the frame (aka no wrinkles or sagging - nobody likes wrinkles or sagging).  Max didn't want to help.

 On the second panel, I saved all the corners for last and I'd do it that way next time.

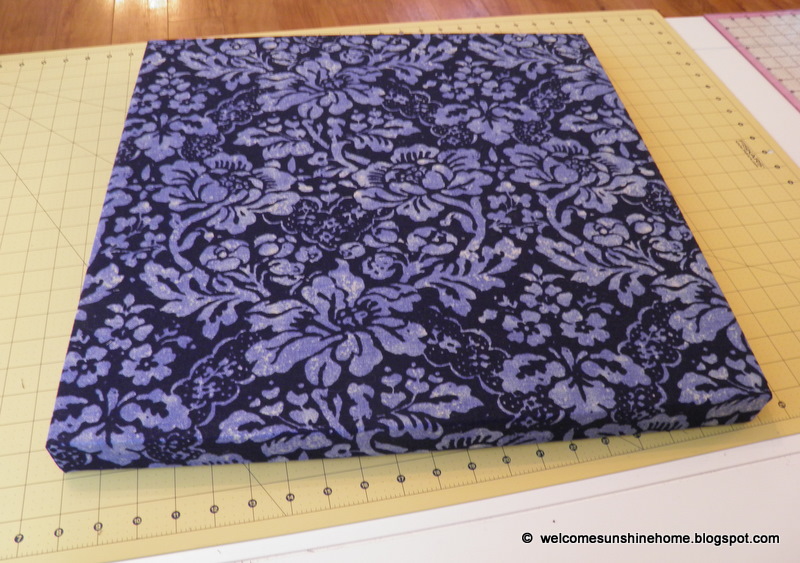
We're done! 

Here's the master bedroom BEFORE:


Time to hang them up!  Jake measured the placement of the panels above our bed.  He put two screws in the wall for each panel so he could easily adjust them from side to side and align them properly.  They're also more stable and less likely to fall our heads while we're sleeping.
AFTER:

Jake did a great job installing them over our bed precisely where I wanted them.

The fabric panels are great for our bedroom because you enter from the side of the bed.  I love that the pattern wraps around the edges.

So, what do you think?

Since we complete this wall art, I've been thinking of other ways I'd like to apply this concept...
-Do a grouping of panels in different fabrics and various sized frames
-Create a basket weave effect using strips of the same fabric or multiple fabrics
-Display a portion(s) of a quilt that can't be salvaged
-Create a new quilt block using clothing from vacations or kids' clothes
-Reuse a sports or concert t-shirt  (Maybe Famous Joe's Tesla jacket, MJ?  No sense of that being hidden in the back of the closet...hehe)
-Create a layered look
-Transfer a favorite photo to fabric
-Group sarcastic/funny t-shirts for fun rec room art

How would you use these frames?

You can see a tour of our master bedroom here.  Thanks for visiting!


All Thingz Related

CreativeShareWednesdays


UndertheTableandDreaming

Keeping It Simple
Related Posts Plugin for WordPress, Blogger...
 

Template by: Bright Sunshine Designs by Mary