Showing posts with label recipes. Show all posts

Friday, December 9, 2011

Show Us Your Life - Favorite Holiday Recipes

Kelly's Korner hosts a weekly Show Us Your Life series and this week's topic is Favorite Holiday Recipes.

Since I've already shared tutorials for my favorite holiday recipes, I'll talk about them here and link to the full tutorials for you.


These tasty bites only take 7 ingredients and everybody loves them!  


They keep well so they're excellent to make ahead, pack up in small cello bags or little treat boxes (drop one each into mini cupcake baking cup liners before putting in box), and then hand them out to friends, co-workers, neighbors, unexpected drop-in visitors, etc through out the season.  I add in some of the super easy Candy Cane Kisses Pretzel Melts (I made a few hundred of those this morning!) to add some color to and stretch our gifts of handmade chocolates even further.


The best part is that you can easily change the filling flavoring extract and use your favorite(s).  My preference is to make them peppermint (these do not have the toothpaste-like flavor/texture that some peppermint candies can get!).  Jake's mom always makes her family's favorite flavor - maple.  You can also split up the filling dough before you add the flavoring extract and make multiple flavors from one batch.

Go here for a full tutorial and you'll learn all the Jordan family secrets to making these yummy chocolates.  :)


These are fun to make and kids of all ages love them.  Jake's mom always makes these for her annual cookie swap party.  I've made them a few times now and they've been a party hit.  I did a Moose Cupcake version with brown M&Ms and chocolate animal crackers this summer. 


Please go here for the Rudolph tutorial.

Head over to Kelly's Korner and link up your own favorite holiday recipes this week.  Plan to come back next week and join the 2011 Christmas Tour of Home hosted by Kelly and The Nester.

I love seeing how every one dresses up their home for the holidays.  So far we have our Christmas tree up (a real Fraser Fir again) and decorated it but I haven't had a chance to take photos yet.  It looks pretty much like last year's tree though since I used the same ornaments.  I think everything else will be out of our Christmas bins by the end of the weekend.  Have you decorated and/or started your holiday baking yet?

Friday, February 4, 2011

Lindsey's homemade peanut butter dog biscuits

Remember the awesome homemade dog cookies that Lindsey sent Max and Brewster for the Christmas pet gift exchange?


A couple weeks ago, she very kindly shared the recipe in the pet exchange post's comments and also emailed me photos she took while making the biscuits and adorable photos of Jasper and Precious with their Christmas gifts.  I thought it'd be nice to post the recipe and photos for everyone to enjoy today.

Peanut Butter Dog Biscuits

 Prep Time:
15 Min
Cook Time:20 Min
Ready In:35 Min

Ingredients

  • 2 cups whole wheat flour
  • 1 tablespoon aluminum-free baking powder
  • 1 cup natural peanut butter
  • 1 cup skim milk

Directions

1.     Preheat the oven to 375 degrees F. Grease cookie sheets. Stir together the flour and baking powder; set aside.
2.     In a medium bowl, mix together the peanut butter and milk. Stir in the flour mixture until well blended. Turn out dough onto a lightly floured surface and knead until smooth. Roll out to 1/4 inch thickness and cut into shapes using cookie cutters. Place onto the prepared cookie sheets.  (They don’t really expand in size, so you can place them close together - about ½” apart.)
3.     Bake for 20 minutes in the preheated oven, or until lightly brown. Remove from cookie sheets to cool on wire racks. 


Note from Lindsey: I used different shape cookie cutters I found to make most of them, and then I had a letter brander for meat when we grill, so I used the letters from that to personalize the heart dog biscuits.


UPDATE 2/7/2011: I forgot to mention before...  There aren't any preservatives in the recipe so I'd plan to use up the biscuits in the same amount of time that you'd eat human cookies.  I store them in the freezer to extend the biscuits' shelf life by a couple weeks.  Bru and Max like them straight from the freezer.  -Alison


 Jasper and Precious are such cutie pies!  I'm so happy they're enjoying their gifts.


Lindsey, thanks so much for sharing your recipe and all these photos!  I can't wait to make a batch for Max, Bru, and all their doggy buddies.  :)

Thursday, December 23, 2010

Simple Handmade Chocolates

Every year Jake's mom makes batches of these handmade chocolates.  Wait, before you get intimidated, hear me out.  There are only seven ingredients.  Kids can help with these and with this recipe you don't need to worry about chocolate temperatures or do math.  Jake helped make them while he was growing up because he wanted to eat them all.  :)

Carolyn usually makes hers with maple flavoring now because she noticed the kids would pick through looking for them.  You can make them any flavor you want (that you can find flavoring extract for anyway) but I wanted to make peppermint.  I'm sure you're not surprised if you've seen our mistletoe mantle, party table coverings, or these treats.  :)

The actual prep time for these isn't long but you'll need two days.  The filling balls need to chill overnight before they can be dipped in the chocolate.

7 ingredients

Supplies


Dough filling (day 1)
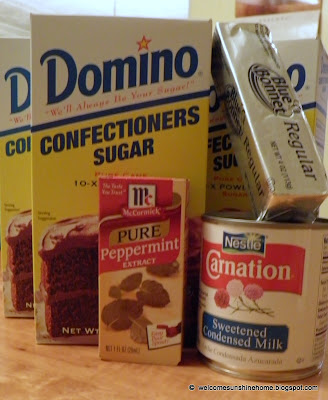
-2.5 boxes Domino confectioners sugar
- 1 stick softened margarine
- 14 oz can Carnation sweetened condensed milk 
- Peppermint extract (or flavoring of your choice)


Chocolate coating (day 2)
- 12 oz semi-sweet chocolate chips
- 4 oz unsweetened baker's chocolate
- 1/2 block paraffin wax (found with canning supplies)

Other
- Sturdy wooden spoon
- Large mixing bowl
- Cookie sheets
- Wax paper
- Toothpicks
- Double boiler (or use big pyrex glass bowl and a pasta pot like me)

DAY ONE
Day 1 Step 1: Gather your filling ingredients.


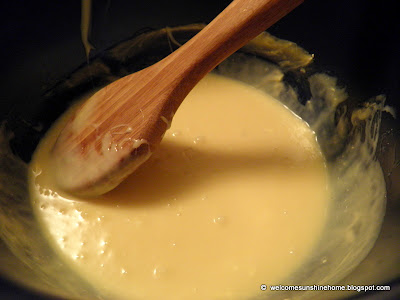
Day 1 Step 2:  Combine the sweetened condensed milk and softened margarine.  Scrape every drop you can get out of the sweetened condensed milk can.

Day 1 Step 3:  First add about 1 cup (and then 1/2 cup at a time) of confectioners sugar and fold/stir together.

Day 1 Step 4:  A dough starts forming and your arm may feel like it's going to fall off.  This is why you need a really thick, sturdy wooden spoon.  Keep going, continue to add in the sugar, and add some peppermint extract to taste (1/2-1 teaspoon at a time).  I think I may have used half the container.

Day 1 Step 5:  Keep adding the 2.5 boxes of sugar until it's gone and check the flavoring.  If your stirring arm gives out, you can call in reinforcements or use clean hands to finish mixing the dough together.  The consistency will be similar to play dough or cookie dough when you're done.

Day 1 Step 6:  Roll the dough into 1 inch balls and chill them.  I preferred to keep them on the smaller side because the filling is sweet.  Remember how much sugar we just used?!  It'll be offset later by the dark chocolate.  Put them in your freezer if possible.  Carolyn has a side by side fridge so she piles hers into bread pans.  I put them on coated paper plates as I rolled them.  Once they were all rolled I stacked the plates in a large food storage container and popped it into the fridge.  Don't stack them too soon before placing them in a chilled area because they'll get a bit flattened.

DAY TWO
Day 2 Step 1:  Gather your chocolate dip ingredients.

Day 2 Step 2: Chop the chocolate squares and wax up a bit.  Lay everything out near your stove top. Put a wax paper covered cookie sheet right next to your stove top too (for later).

Day 2 Step 3: Heat water in your double-boiler.  My double-boiler is an ordinary pot with a pyrex bowl resting on the rim.

Once it looks something like this move on to the next step.  :)

Day 2 Step 4:  Add chocolate chips, chocolate chunks, and wax chunks.  Melt and blend.  Don't dump everything in at once; give this step a few minutes and you'll be rewarded with smooth and glossy chocolate to dip your filling balls in.


Day 2 Step 5:  It's dipping time!  Get your chilled filling balls out of the freezer (we did one plate at a time).  Poke a toothpick into a ball, dip it into the melted chocolate, twirl the ball over the double-boiler until it stops dripping, place the ball on your wax paper covered tray, and twist the toothpick to release it.  Repeat a few dozen times.  :)  BTW, Jake's man hands are in the photos below.  I was busy playing photographer.

Dunk

Twirl

Plop and Twist

Day 2 Step 6:  Chill again so chocolate can set well.  Room temperature is ok too but it'll take longer.  I prefer eating them chilled so we kept them in a gallon size ziploc bag in the fridge once they were firmly setup.

Another tip: Use the flat toothpicks that have a thinner head.  We used some party picks that were round which left bigger holes on the tops of the chocolates and a bit of filling popped out of some.  Anyone know the scientific reason for that?  I don't.  I'm just hoping you do.  :)  They still taste great and no one else seemed to notice.


Mmm.  I can almost taste the frosty, peppermint goodness.


Here's a behind the scenes look at our chocolate dipping assembly line.    
 Jake's left handed so we put the wax paper lined cookie sheets and double-boiler on the left.  Then, we placed the paper plate of filling balls on a sauce pan to the right.  We also elevated the cookie tray so everything was at the same level.


We made two batches (recipe above is for one) that tasted like peppermint patties and they were a hit.  They don't have that toothpaste flavor (or texture) that some peppermint candies can get.  Yay!  One batch of these goes a long way though.  They make a great handmade gift when wrapped in cello bags or small treat boxes.

UPDATE: Small amounts of wax are often used in older chocolate candy recipes.  It helps thin the melted chocolate making dipping easier and also helps the coating setup and harden.  The wax makes this recipe 'no fuss' because you don't need to worry about tempering the chocolate or track down candy melts.  Nowadays you might be able to find and use candy melts like Wilton's instead.

Enjoy!


Click here to see some of the parties we'll be mingling at this week.

Monday, December 20, 2010

Frugal, Fast, and Festive! - Candy Cane Kisses

Looking for a last minute semi-homemade holiday gift or potluck treat?  Give these cuties a try and you will not be disappointed!  The best part is how quickly you can whip up a batch.  :)


When I saw the "peppermint pretzel melts" on My Computer is My Canvas, I bookmarked it immediately and knew that I just had to make my own so I could try them.  Jake and I made homemade peppermint chocolates (using his mom's recipe - post coming soon) to send home with our holiday party guests and these treats added a little extra oomph to our gift bags.

Supplies for one cookie sheet of Candy Cane Kisses treats:
115 square pretzels
about 1/2 cup holiday plain M&Ms
2 bags Candy Cane Hershey Kisses
wax paper
cookie sheet

1) Preheat your oven to 175 degrees.

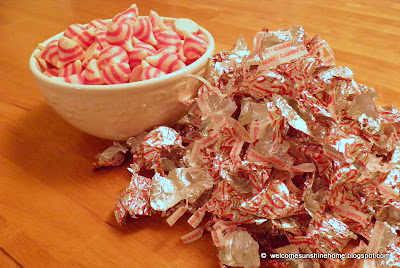
2) Prep work: Gather everything, unwrap all the Kisses, and sort your M&Ms (if desired - I wanted red only).


3) Cover your cookie sheet in wax paper.  Please don't skip this step.

4) Line up your pretzel squares on the wax paper then top each one with a Kiss.

Note the dull, flat look of these Kisses.

5) Carefully transfer the cookie sheet to the oven.  Set your oven timer for 5 minutes and do not walk away.   Watched Kisses do melt soften, I promise.  After 4-6 minutes, they'll be ready to remove from the oven.  I repeat do not walk away.  Take them out of the oven when the surface of the Kisses looks glossy, their Kiss shape is still sort of be intact, and they're softened (not melted).


6) Right after removing the cookie sheet from the oven, carefully plop one M&M onto each Kiss.  They'll get the smooshed look instantly.

7)  Chill them in the fridge for a few minutes or just let them sit on the counter for a while until they set.  Then, package them up in cello bags or toss them onto a platter.  You're done!

You could also try making these with other combinations of Kisses flavors and candy toppers.  I think milk chocolate Kisses topped with Reese's Pieces would be excellent.  Hey, does anyone else think of E.T. immediately when they see Reese's Pieces or is that just me?


Click here to find the printable sheet of the M&M nativity legend that Colette created.

Don't forget to check back for my tutorial of Jake's mom's homemade dipped chocolates recipe.  It's so easy (aka no candy thermometer or math required) that your kids or significant other can help.   ; )


Click here to see some of the parties we'll be mingling at this week.
Related Posts Plugin for WordPress, Blogger...
 

Template by: Bright Sunshine Designs by Mary